We get asked this question quite a bit at the Portfolio Center, and the answer is simple –
A portfolio attests to your work, accomplishments, and skills, and documents the breadth and depth of your ability and experience. It rounds out your resume, making you more attractive to employers and clients and increases your chances of being hired over someone who has just a resume and website.
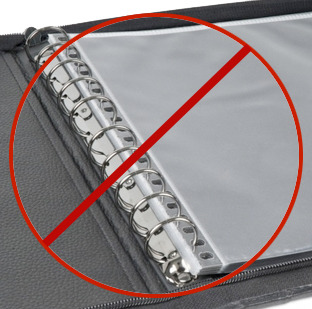
Employers and clients today prefer printed portfolios over the old versions of traditional zippered cases, black binders, and glaring plastic sleeves.
Printed portfolios typically have a cover/title page with your name on it, followed by 20-25 pages of your best work, ending with your contact page. You do not need to include your resume in your portfolio, but should have copies readily available.
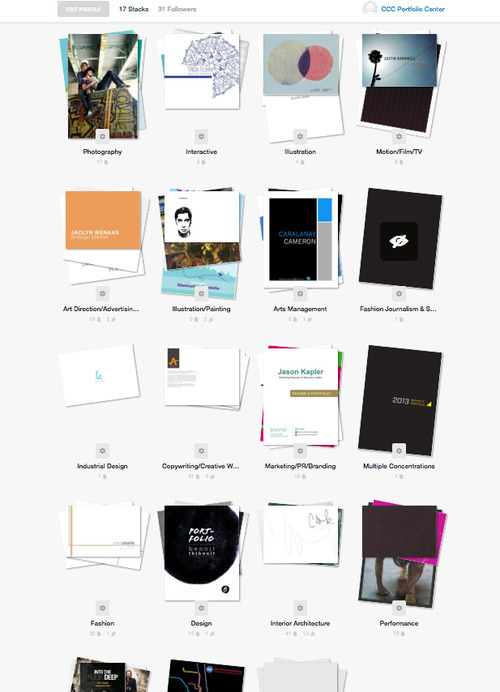
If you’re not sure what goes into your portfolio, contact your creative industry liaison at the Portfolio Center for guidance, or view some samples of portfolios from different industries here.
Other questions surrounding your portfolio….
Should I print my own or can someone print it for me?
You can print your work yourself or send it out to a Print-On-Demand company. Print-on-Demand companies usually only print, not design, your portfolio. You can create your portfolio in Word, Power Point, InDesign, or other software you are familiar with. Most Print-on-Demand companies accepts pdf’s for upload. Always be sure you’ve triple-checked for typos & other things like clarity/resolution, color, and borders that will lessen the quality and appearance of your efforts.
If you are printing yourself, make sure you buy enough paper to print a cover page, your internal pages, and an end page with your contact information. It’s always a good idea to have extra paper in case you need to make adjustments from what your monitor sees to how your paper reacts. Most paper companies include a “printer profile” it their packaging. If you’re using a basic Canon or Epson printer, you can usually use the custom/manual settings and choose high quality on a photo matte paper.
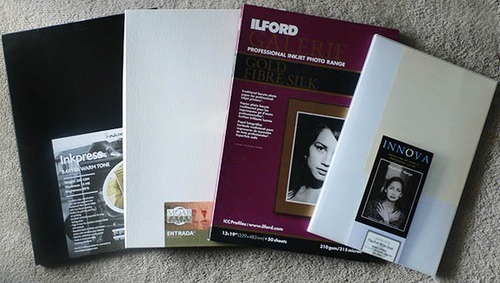
There are beautiful inkjet papers you can buy that are single-sided or double sided, with different textures & finishes. You can find these papers through companies like Moab, Hahnemuhl, Red River, Ilford, and others. Many sell sample packs so you can try before you buy. You do not want to use any papers that have the manufacturers name on the back side.
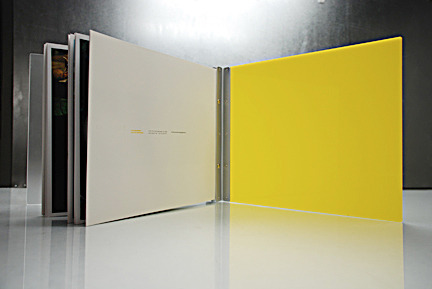
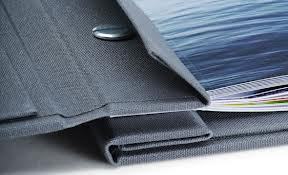
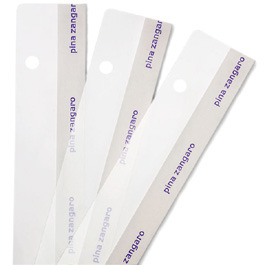
If you are printing your own work, you’ll need to assemble it into a book or box. Screw-Post books are easiest and most interchangeable as you grow your body of work. They come in a variety of sizes & styles, & can be purchased from these manufactures, who most likely will also sell the adhesive strips which attach to the back of the print. After the strips are added, your prints are ready to put into your book.
You can also make a hand-made book, but this is often a time-consuming process that most students prefer to bypass.
Issuu.com is a great place to look at portfolios others have created. The Portfolio Center has a curated page of samples of print portfolios for different industries. Seeing how others have organized their work can help you decide what you like & don’t like, before you start working on your own.
Is there an order my work should be in?
That’s a tough one to answer without seeing someone’s work. What we can tell you is that the work should be organized & easy to understand for the viewer. If you have multiple projects, be sure to separate them with landing pages, an icon, something that creates a pause for the viewer alerting them that they are about to look at something new. If your work is data-driven or word heavy, use page headings & bullet points to organize the work so each page isn’t paragraphs only. Press releases, social media examples & brand icons are great ways to introduce some visuals & break up large blocks of text.
My work is mostly video & audio clips? How do I make a print book with that?
For moving pictures and interactive samples, carefully edited screen captures are great ways to show a sample of that work, with a link to where the viewer can watch it live. Your print book would still consist of a cover page with your branding, the visuals from your screen captures or performance photos, bulleted lists of performances, pieces you’ve written, etc., press releases, your contact info/website, and anything else that sells you! You can also have smaller 5×7 mini-print portfolios printed at online sites like Presto Photo that you can leave with potential clients, or have a Press Kit printed. Not sure what goes into a press kit? Read this.
I have projects that are very long, how do I condense them in my print book?
Select the pages that are pertinent to the project, giving the viewer a brief overview of the challenge, and how you accomplished it. You can also add a line to bottom of the first page of the project that says something like, “This is a condensed version of this project, to see it in its entirely, please visit my website: www.yourname.com
My work is not in digital format, do I scan it or photograph it?
Scanning can be difficult depending on the size of your original. Images & text scanned to PDF are often light in color and fuzzy if the resolution is low. Neither look good in a portfolio. Your best option is to photograph your work. Whether you use a copy stand & stand (pictured below) or make a foamcore box, even lighting is the key ingredient to creating a quality digital duplicate of your original.
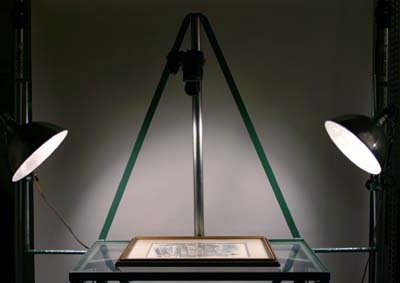
Copy stands, like the one above, are rare and not easily accessible to students. An alternative is to use a 5 megapixel or higher camera. We have had some success with smartphones that have good resolution, but most do not – In the example below, I did use an iPhone 5 the resolution was good up to 8.5 x 11. I Would not recommend for 11×14 portfolios)
To build a foamcare box:
1) Buy 4 sheets of 16×20 or 20 x24 depending on the size of your artwork, at a local art store.
2) Assemble into an open-sided box & set in an area that doesn’t have direct light that would cast shadows. (Cloudy days are best as the light is diffused)
3) Lean your artwork against the back side of the box. If it is flexible, you will need to carefully adhere it to a piece of rigid material to help it stand up.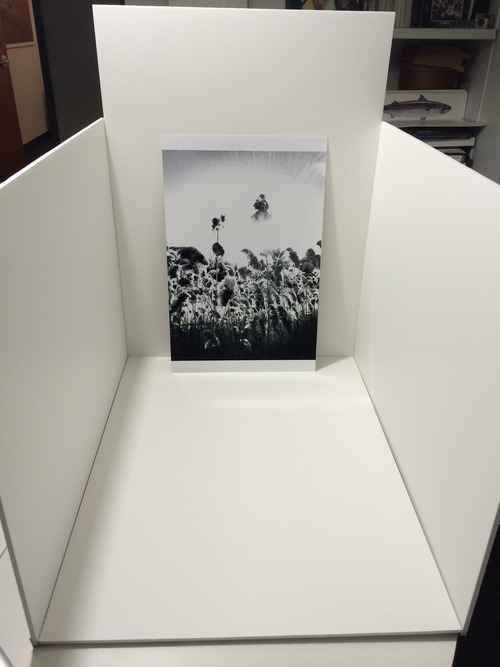
4) Position your camera lens at the same angle as the artwork. Use a tripod if you have one to hold the image steady. Take multiple images & check to make sure you have one that is 100% in focus, edge to edge.

5) Import your images into image editing software to help lighten/darken as needed. Photoshop is great, but if you don’t have it, you can use iPhoto on a Mac, or Fotor.com if you’re on a PC. (free) Be sure to save your images to a hard drive in a folder that you can find easily.
Once you have your final body of work assembled in a printed format, show it with confidence! Your website should also mirror the branding and imagery that you are showing in your print book & on your marketing materials. Virb.com provides free template-based websites to students for 2 years, using your loop email. There are Virb workshops on the Portfolio Center site under Events, as well as Virb walk-in hours everyday from 11am-1pm for one-on-one help.
Still have questions? Call or make an appointment with your Creative Industry Liaison at the Portfolio Center, and visit our Website for additional information about exploring your career, building your portfolio, and finding employment opportunities!
Best of luck!
– the Portfolio Center Staff